Showing posts with label Hell Pit Abomination. Show all posts

Sunday, April 27, 2014

Projects Update - 04/27/2014

Good evening once again, readers.  I haven't managed to finish anything other than Jack Rider's base today (pictures later, as promised), but I did do a little on a large number of things.
First off, I started getting washes on my Tau forces, along with some of the other miniatures that I've been working on (including that Fire Eagle teased earlier:


Here's some Tau.


And, yes, some more Tau


One of the Heavy Support vehicles from Wild West Exodus


And her's the fire eagle, all washed and waiting for painting!

I've also done a bit of a step by step for the Plains base that I discussed yesterday.


First, apply the white glue over the painted base.  Remember to leave any areas that you want peaking through unglued.


Step two, just dump the static grass mix onto the base.  You can see the mix that I've gone with - perhaps a bit heavy on the talus, but it does create a nice textured effect to the base that really makes the figure stand out.


And this is the final product.  Nice, easy, and very quick to do.

Now, something that I should probably have started out with, but will cover now.  Pictures of applying sand to a base - and what it can do for your figure.  As you can see below, this is very useful, particularly if the figure has parts that attack to the base without being part of the base itself, allowing them to blend together much more easily without hacking the figure apart (particularly if you are working with one of the Reaper pewter miniatures with the so-called integrated Broccoli  base):


Step one: apply the white glue to the base.  Make sure that you minimize the amount of glue that  gets on the figure itself, but don't worry about it too much as you can clean it up after dipping the base in the sand.


Here's what it looks like after applying the sand and cleaning off the edges and miniature.  Pay close attention to the bit under the lower right arm, and notice how the raise blends with the rest of the base now, rather than being as obviously a separate piece.

Now, finally, we have my current WIP.  Meet Karzoug, by Reaper Miniatures.  Great figure, and is really looking good so far (even though it's only about half way done).


And that does it for today.  Tune in tomorrow to see what I've managed to get done, and I'll talk about painting the base different colors for the basing - I think I'll give this one a desert color scheme.

Friday, April 25, 2014

Feel the power!

Good evening, readers!  Not a lot new on my plate today.  I have assembled the next piece of the Skaven army (I'll post up the rest of what I have so far sometime this weekend, when I get it all set up and get pictures of it), which you can see here:


After talking with Sean from the Games Workshop store, I thought I'd take a bit to talk about basing miniatures and some of the things that I've done with them (along with how-tos on how to accomplish them), so through the next several days, I'll be digging through my Photobucket account (which you can certainly browse at your leisure here: Magius's Photobucket Library  - though do note that I haven't uploaded new pictures there for a while...  I really should rectify that...  Well, that's what this blog is for!  Also note, some figures presented are NSFW)

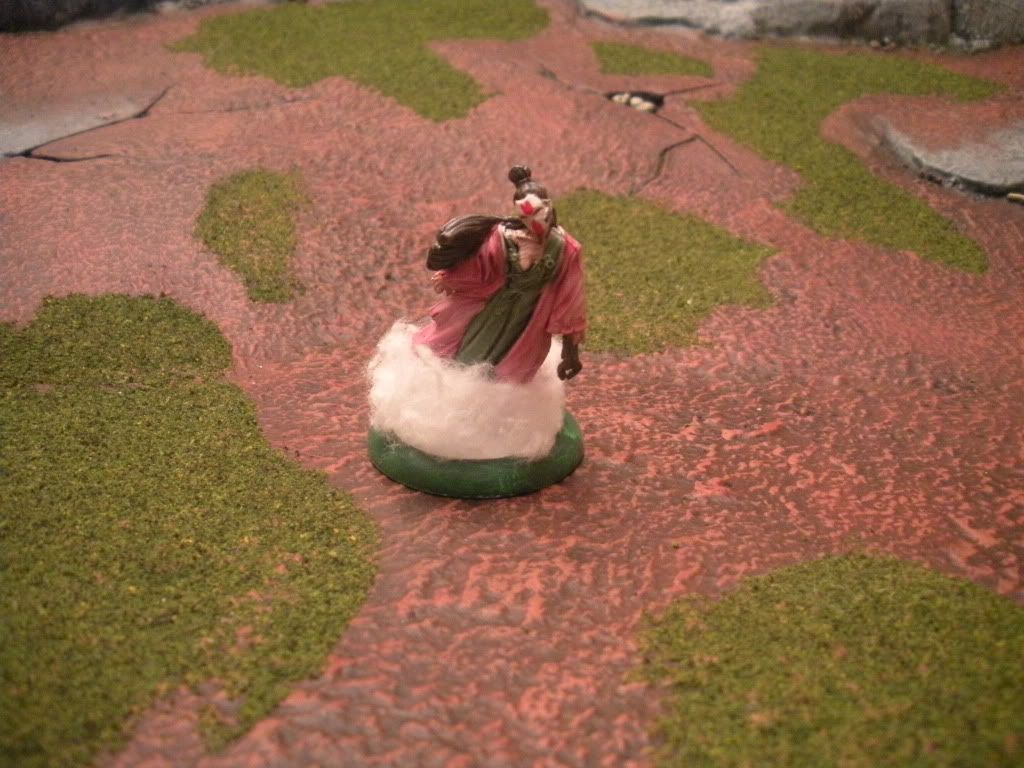
I'll start with one of the easier ones to do, but one that will definitely give you a very creepy vibe if you do it correctly - the Fog/Cloud base:


How this one works is after basing the model with the appropriate color (I like to use white for figures that are supposed to be in a deep fog, or normal basing if they are just walking around), you take a piece from a cotton ball, shred it out until its a good fit for the base, and glue the cotton wisps to the base.  This gives the figure the look of walking through a dense, low fog (great if you don't like painting feet, or really mess up the bottom part of the figure - or even just hate doing bases in the first place).  Really, that's about it, and it can give you some really impressive results.

Like this one, which I just painted up tonight.  Let's  give a warm welcome to one of the LE Sophie miniatures from Reaper Miniatures!  (It feels good to get a miniature finished in a single evening again):


Thank you everyone for reading, and I hope to have more to share with you all tomorrow (though I never know what I'm going to grab to paint).